Installing a pool is a thrilling journey—but without a clear roadmap, it can quickly become overwhelming. From navigating permits to choosing the right contractor, every decision impacts your timeline, budget, and final result. In this guide, we break down the pool installation process into 8 manageable steps, sharing insider tips to avoid pitfalls and highlighting how Hi Poolss streamlines the experience with expertise and transparency. Let’s dive in!
Step 1: Define Your Vision and Budget
– Pool Type: Concrete offers endless customization, fiberglass speeds up installation, and vinyl-liner keeps costs low—choose based on priorities like flexibility, timeline, or affordability.
– Features: Prioritize add-ons (spas, waterfalls) that align with your lifestyle, whether it’s entertaining, relaxation, or family fun.
– Budget: Factor in a 10–15% contingency for surprises like rocky soil or permit delays to avoid financial stress mid-project.
Hi Poolss Insight: During our free design consultations, we use 3D rendering tools to bring your ideas to life and match them to realistic budgets. Book your free estimate today to explore options tailored to your backyard and goals!
Step 2: Choose the Right Contractor
Selecting the right contractor is the cornerstone of a successful pool installation. Start by verifying credentials: licenses and insurance are non-negotiable to ensure compliance with local laws and protect you from liability, while certifications like APSP (Association of Pool & Spa Professionals) or NSPF (National Swimming Pool Foundation) signal advanced training and industry standards. Next, scrutinize their portfolio—look for experience with your specific pool type (e.g., concrete, fiberglass) and design style (modern, tropical) to confirm they can execute your vision flawlessly. Finally, dig into reviews on platforms like BBB (Better Business Bureau) and Google, and request client references to gauge reliability, communication, and post-installation support.
Red Flag Alert: Steer clear of contractors who refuse to provide itemized bids (a sign of hidden fees) or demand hefty upfront payments—reputable professionals tie payments to project milestones. At Hi Poolss, we simplify this step with transparent quotes, a 5-star rated portfolio, and a free estimate that includes a full breakdown of costs and timelines. Let us prove why trust and expertise matter most in bringing your backyard dream to life.

Step 3: Secure Permits and Approvals
Installing a pool isn’t just about digging a hole—it’s about adhering to local regulations designed to keep your family and community safe. Most municipalities require permits to ensure your pool meets zoning laws, environmental guidelines, and safety standards. **Common requirements include:
– Safety barriers: Fencing (typically 4–5 feet tall with self-latching gates) or removable mesh covers to prevent accidental drownings.
– Setbacks: Maintaining specific distances from property lines, septic systems, or utility lines to avoid legal disputes or hazards.
– Drainage plans: Grading and runoff systems to prevent flooding, which protects both your yard and neighboring properties.
Skipping permits might seem tempting to save time, but the risks are steep: fines, forced removal of the pool, or even liability if someone gets injured. Navigating these rules can feel overwhelming, especially since requirements vary by city, HOA, or climate zone (e.g., earthquake-prone areas may need reinforced structures).
Hi Poolss Perk: Let us tackle the red tape! Our team handles everything—from submitting permit applications to coordinating inspections with local authorities. We know the ins and outs of regional codes, whether it’s securing coastal construction approvals or navigating HOA design restrictions. With Hi Poolss, you’ll avoid delays, fines, and paperwork headaches, ensuring your project stays legal, safe, and on schedule. Ask about our permit-inclusive free estimate to start your project worry-free!
Step 4: Prep Your Site
Soil Testing: The foundation of a durable pool begins with understanding your soil. Soil testing identifies stability risks—like expansive clay that shifts with moisture or bedrock requiring specialized excavation. At Hi Poolss , our geotechnical experts analyze soil composition to recommend solutions, such as compacted fill or retaining walls, ensuring your pool’s structure remains intact for decades.
Utility Marking: Striking underground utilities can lead to dangerous outages or costly repairs. We coordinate with local “Call Before You Dig” services (like 811) to mark gas, water, and electrical lines, then adjust the pool’s layout to avoid these hazards. This proactive step not only safeguards your property but also keeps the project on schedule by preventing unexpected delays.
Grading and Drainage: Proper grading ensures your pool sits level while directing rainwater away from the foundation. Our team uses laser-guided tools to slope the site, integrating French drains or permeable pavers to prevent erosion and flooding. With Hi Poolss, meticulous site prep means fewer headaches during installation—and a backyard that stays pristine through storms. Ready to start? Schedule your free estimate today to get a site-specific plan tailored to your property!
Note Tip: Schedule excavation during dry seasons to avoid muddy complications.
Step 5: Excavation and Structural Installation
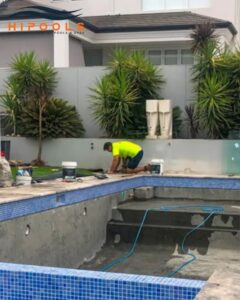
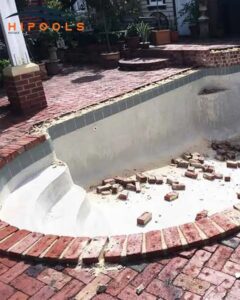
Excavation: This phase transforms your backyard blueprint into reality. Using heavy machinery like backhoes and excavators, crews dig the pool’s footprint—typically taking 1–3 days, depending on soil type and accessibility. Rocky terrain or buried debris can slow progress, but experienced operators adjust techniques to minimize delays. Proper excavation ensures the pool’s depth and shape align with your design while avoiding underground utility lines flagged during site prep.
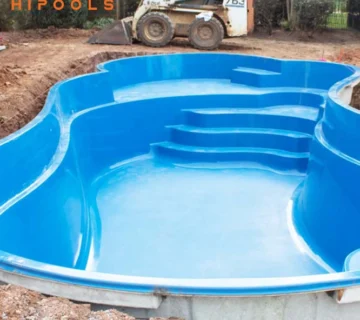
Framework Installation: Next, the pool’s skeleton takes form. For concrete pools, steel rebar grids are welded into place, providing structural reinforcement before shotcrete (a high-pressure concrete mix) is sprayed into the mold. Fiberglass pools arrive as a single pre-formed shell, carefully lowered into the excavation with cranes and leveled for precision. This stage demands meticulous attention to detail—even minor alignment errors can lead to cracks or uneven finishes. Hi Poolss’ engineers use laser-guided tools to ensure flawless positioning, whether crafting a custom concrete masterpiece or securing a sleek fiberglass shell.
Plumbing and Electrical Systems: With the structure set, technicians install the pool’s “circulatory system.” PVC pipes for filtration, heating, and water features are laid, while electrical conduits power pumps, lighting, and smart controls. This phase includes pressure testing pipes and insulating lines in colder climates to prevent freezing. Hi Poolss integrates energy-efficient equipment (like variable-speed pumps) and future-proofs wiring for tech upgrades, ensuring your pool operates smoothly for years. Inspections by local authorities often follow to verify compliance with safety codes—a step we manage seamlessly on your behalf.
Timeline Snapshot
| Pool Type | Excavation & Installation Time |
| Concrete | 6–12 weeks |
| Fiberglass | 2–4 weeks |
| Vinyl-Liner | 1–3 weeks |
Step 6: Finishing Touches
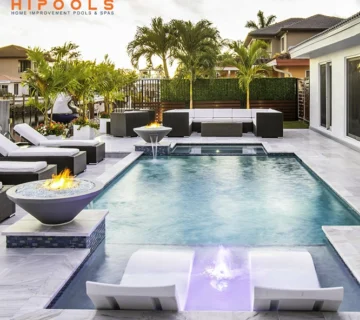
Interior Finish: The pool’s interior sets the tone for its aesthetic and durability. Plaster offers a classic, smooth look at a lower cost but requires resurfacing every 10–15 years. Quartz and pebble finishes add texture and color while resisting stains and wear, ideal for high-traffic pools. For luxury seekers, glass tile mosaics create shimmering visual depth but come with a premium price tag. At Hi Poolss, we help you balance beauty and practicality, offering finishes backed by extended warranties to protect against chipping or fading.
Decking: Your pool deck is both a functional surface and a design statement. Stamped concrete mimics high-end stone at a fraction of the cost, while natural stone pavers (like travertine or bluestone) offer timeless elegance and slip resistance. For modern flair, composite decking combines durability with low maintenance. Hi Poolss’ designers ensure your deck complements the pool’s style—whether it’s a rustic oasis with flagstone or a sleek, geometric space with polished concrete. We also integrate subtle slopes and textured surfaces to prevent slips and pool water runoff.
Landscaping: Transform your backyard into a cohesive retreat with strategic landscaping. Privacy hedges (e.g., arborvitae or bamboo) shield your oasis from neighbors, while LED lighting highlights water features and pathways for evening ambiance. Add warmth with a fire pit or outdoor kitchen, creating zones for dining and relaxation.
Hi Poolss Signature Touch: Our team collaborates with landscapers to address practical needs—like planting drought-resistant flora to reduce irrigation or installing French drains to protect your pool from runoff. The result? A harmonious outdoor space where every detail feels intentional.

Step 7: Fill, Test, and Balance
1. Fill the Pool:
– City water is typically pre-treated for safety, while well water may need filtration or chemical adjustments to remove minerals or contaminants. Proper filling ensures clean, swimmable water from day one.
2. Test Systems:
– Inspect pumps, heaters, and filters for leaks or inefficiencies to avoid costly repairs. A pressure test ensures plumbing integrity, while electrical checks confirm safe operation of lighting and automation.
3. Chemical Balance:
– Adjust pH (7.2–7.6) and alkalinity (80–120 ppm) to prevent skin irritation and equipment corrosion. Sanitizers like chlorine (1–3 ppm) or salt systems keep water bacteria-free and crystal clear.
4. Checklist for Handover:
– Operation manuals provide troubleshooting guidance and optimize equipment use.
– Warranty documents safeguard against defects in materials or craftsmanship.
– Maintenance schedules outline tasks (e.g., filter cleaning, shock treatments) to preserve water quality and extend pool life.
Step 8: Enjoy and Maintain
– Daily: Skim debris to prevent clogs and check filter pressure to catch early signs of blockages.
– Weekly: Test water chemistry to maintain balance and vacuum floors to eliminate algae-friendly dirt buildup.
– Seasonal: Winterize pipes to avoid freeze damage and inspect covers for wear to ensure safety and longevity.
Why Choose Hi Poolss?
– 10-Year Structural Warranty: Peace of mind for your investment.
– Transparent Pricing: No hidden fees—every cost is outlined upfront.
– Turnkey Service: We manage permits, inspections, and cleanup.
Bonus: Book your installation between September–February for faster timelines and off-season discounts!
Conclusion: Dive Into Your Backyard Oasis
Installing a pool is a complex process, but with the right planning and partner, it’s also one of the most rewarding home upgrades. By following this guide and partnering with Hi Poolss, you’ll avoid common pitfalls and enjoy a seamless journey from concept to completion.
Ready to Make a Splash? Contact Hi Poolss for a Free Quote and Design Consultation Today!


No comment