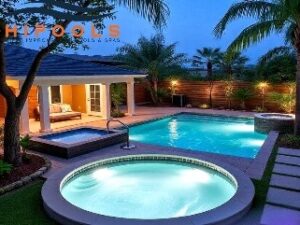
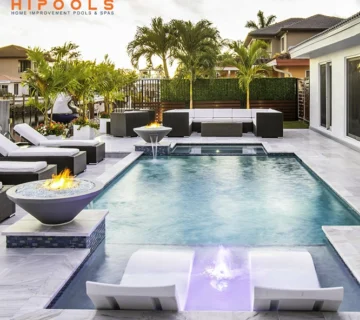
Imagine transforming your backyard into a luxurious retreat where family and friends gather to swim, relax, and make memories. A pool installation is more than just a home improvement project—it’s an investment in your lifestyle and property value. However, the journey from concept to completion involves critical decisions: hiring a professional vs. DIY, selecting materials, planning your budget, and designing a space that reflects your vision. In this comprehensive guide, Hi Poolss breaks down everything you need to know about pool installation, from popular materials to landscaping tips.

Hiring a Pool Contractor vs. DIY Installation
The first decision you’ll face is whether to hire a professional pool contractor or tackle the project yourself. Both options have pros and cons, so let’s explore what each entails.
Why Hire a Professional Pool Contractor?
1. Expertise and Experience: Licensed contractors bring years of knowledge, ensuring compliance with local building codes and safety standards. They’re trained to handle challenges like rocky soil, sloping yards, or complex plumbing layouts.
2. Time Savings: Professionals handle permits, design, and installation, freeing you from months of labor. For example, a contractor can expedite inspections and avoid delays caused by incorrect paperwork.
3. Warranties and Insurance: Reputable companies offer warranties on workmanship and materials, protecting your investment. If a pump fails or a crack forms, they’ll fix it at no extra cost.
4. Complexity Management: Inground pools, especially those using gunite or fiberglass, require specialized equipment like cranes or shotcrete rigs. Contractors also manage subcontractors (electricians, plumbers) for seamless coordination.
How to Vet a Pool Contractor:
– Check licenses, insurance, and certifications (e.g., APSP or NSPI).
– Ask for references and visit past projects.
– Avoid contractors who demand full payment upfront or provide vague contracts.
Drawbacks of Hiring a Contractor:
– Higher upfront costs (labor can account for 30–50% of the total budget).
– Less hands-on control over the project timeline and design tweaks.
The DIY Approach: Is It Worth It?
DIY pool installation is typically limited to smaller, above-ground vinyl or fiberglass kits. While it saves money, consider these challenges:
– Permitting and Regulations: Navigating zoning laws (e.g., setback requirements) and utility line checks (call 811 before digging) can be overwhelming.
– Physical Labor: Excavation, leveling, and plumbing demand significant effort. For example, leveling a 24-foot above-ground pool requires precision to prevent wall collapses.
– Risk of Errors: Mistakes in sealing joints or installing liners can lead to leaks, costing thousands to repair.

Stylish selection of modern swimming pool tiles
DIY Toolkit Essentials:
– Laser level, shovel, tamper, utility knife, and PVC pipe cutters.
– Safety gear: gloves, goggles, and steel-toe boots.
Verdict: DIY works for simple above-ground pools, but inground installations and complex designs require a professional.
Popular Pool Materials: Gunite, Vinyl, and Fiberglass
Choosing the right material impacts your pool’s durability, aesthetics, and maintenance. Here’s a breakdown of the top three options:
1. Gunite (Concrete)**
– Pros: Fully customizable shapes/sizes (think freeform lagoons or geometric lap pools), durable (50+ years), and compatible with luxury features like infinity edges or built-in spas.
– Cons: Expensive ($50,000–$100,000+), lengthy installation (3–6 months due to curing time), and requires resurfacing every 10–15 years. Acid washing and replastering add $10,000+ over time.
– Best For: Homeowners seeking a high-end, tailor-made pool.
2. Vinyl
– Pros: Affordable ($25,000–$45,000), quick installation (2–4 weeks), and smooth surface (gentle on feet). Liners come in patterns like marble or tile for customization.
– Cons: Liner replacements every 7–10 years ($4,000–$5,000), vulnerability to punctures (keep pets’ nails trimmed!), and limited depth options.
– Best For: Budget-conscious buyers wanting a simple inground or above-ground pool.
3. Fiberglass
– Pros: Low maintenance (non-porous surface resists algae), quick installation (2–4 weeks), and smooth finish. No need for annual acid washing.
– Cons: Limited sizes/shapes (pre-made shells restrict design), higher upfront cost ($40,000–$85,000), and potential for gel coat cracks in freezing climates.
– Best For: Families prioritizing quick installation and easy upkeep.
Emerging Materials:
– Composite Pools: Lightweight, eco-friendly panels made from recycled plastics.
– Stainless Steel: Sleek, modern, and corrosion-resistant, but rare and pricey ($100,000+).
Step-by-Step Guide to Pool Installation
Whether you hire a pro or DIY, understanding the process ensures a smooth project.
1. Planning and Design
- Work with a designer to finalize size, shape, and features (lighting, waterfalls, etc.). Use 3D software to visualize the result.
- Secure permits (varies by state; Florida requires a DPBR license) and check for utility lines underground.
2. Excavation
- Heavy machinery digs the hole, guided by your pool’s dimensions. Rocky soil may require jackhammering ($1,500+ extra).
3. Structural Installation
- Gunite: Steel rebar is framed, then sprayed with concrete. Curing takes 28 days, followed by plaster or tile finishes.
- Vinyl: A metal/polymer frame is secured, followed by liner placement (stretch carefully to avoid wrinkles).
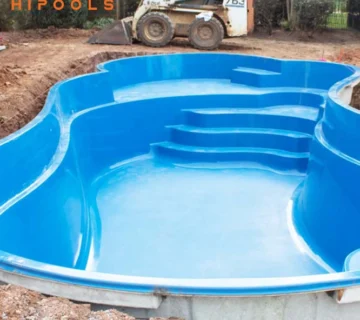
- Fiberglass: Pre-made shell is lowered into the hole with a crane, then anchored with gravel backfill.
4. Plumbing and Electrical
- Pumps, filters, and heaters are installed; electricians wire lighting and control systems. Opt for variable-speed pumps to save $300+ annually on energy.
5. Finishing Touchesl
- Decking (concrete, pavers, or composite wood), coping, and landscaping complete the space. Add a safety fence to meet local codes.
6. Inspection and Fill-Up
- Local authorities inspect for code compliance before filling the pool with water. Use a hose filter to prevent metal stains.
Note Tip: Schedule installations in fall/winter for lower contractor rates and spring readiness.

Planning Your Pool Installation: Budget and Design Considerations
Budgeting Tips
– Set a realistic budget, including a 10–15% contingency for surprises like soil issues or material delays.
– Factor in long-term costs: maintenance ($1,200–$1,800/year), heating ($300–$500/month), and repairs.
– Financing options: Home equity loans, contractor payment plans, or green energy rebates for solar heaters.
Design Essentials
– Size and Shape: Match the pool to your yard’s dimensions. Kidney (for small yards) and rectangular (for lap swimming) shapes are timeless.
– Depth: Include a shallow lounging area (3–4 feet) and deeper sections (6–8 feet) for diving (check local laws; some states ban diving boards).
– Extras: Consider automation systems (control temperature via smartphone), saltwater conversion ($1,500–$2,500), or energy-efficient heaters.
ROI Insight: Inground pools recoup 50–70% of their cost in home value, while above-ground pools add minimal resale value.
Types of Pools: Inground vs. Above Ground
Inground Pools
Inground Pools: These permanent fixtures offer the ultimate customization, boosting property value. However, they come with a significant price tag ($35,000 to $100,000+) and a lengthy installation (3-6 months).
Above-Ground Pools: For a budget-friendly option ($1,500 to $15,000), above-ground pools provide quick setup (1-3 days) and portability. Their lifespan is shorter (7-15 years), and aesthetic options are limited.
Semi–Inground Pools: A middle ground, these pools combine a polished look with easier installation at a cost of $20,000 to $40,000.
Which is Right For You?
Inground pools suit long-term homeowners, while above-ground options work for renters or tighter budgets.

78 Beautiful Swimming Pool Designs
Inground swimming pool gallery
Landscaping Around Your Pool: Ideas and Tips
Creating a stunning poolside landscape involves balancing safety, aesthetics, and functionality. Prioritize safety with essential features like secure fencing, non-slip decking materials, and automatic pool covers. Enhance the visual appeal by selecting appropriate plants, opting for tropical palms, ornamental grasses, or succulents while avoiding messy trees. Strategic lighting, such as LED pool lights or solar path lights, sets the mood for evening enjoyment, and tiki torches can add a touch of resort-style ambiance. Maximize the pool area’s usability by incorporating functional spaces like a patio with weather-resistant furniture, a shaded pergola, or an outdoor kitchen.
For an environmentally conscious approach, consider eco-friendly landscaping practices. Utilizing native plants can minimize water consumption, and installing a rain garden helps manage pool runoff. To personalize your poolside retreat, explore various theme ideas. A tropical paradise theme can be achieved with banana plants, bamboo fencing, and thatched umbrellas, while a modern minimalist theme can be realized with sleek concrete planters, monochromatic lounge chairs, and geometric pavers.
Maintenance and Upkeep
Regular upkeep of a pool involves daily or weekly tasks such as skimming debris off the water’s surface, testing and adjusting pH levels (ideally between 7.2 and 7.8), and vacuuming the pool floor and walls to prevent buildup. These routines ensure water clarity and balance, creating a safe and inviting swimming environment.
On a monthly basis, deeper maintenance is required. This includes shocking the pool to eliminate contaminants, thoroughly cleaning or backwashing filters to maintain proper water flow, and inspecting equipment like pumps, heaters, and seals for wear or damage. Addressing these tasks proactively helps prevent costly repairs and extends the lifespan of pool systems.
Seasonal care focuses on preparing the pool for weather changes. Before winter, pipes should be winterized to avoid freezing damage, a durable cover should be secured to protect against debris, and nearby trees should be trimmed to minimize leaf litter. These steps safeguard the pool during periods of inactivity and reduce spring cleanup efforts.
In addition to routine tasks, certain situations demand professional expertise. Persistent algae blooms that resist standard treatments—especially those requiring partial or full draining—should prompt a call to a specialist. Similarly, mechanical issues like pump failures, heater malfunctions, or structural problems such as cracked tiles or leaks need expert attention to ensure safe, long-term functionality. Addressing these early can prevent minor issues from escalating into major repairs.
| Frequency | Tasks |
| Daily/Weekly | Skim debris, test pH levels (7.2–7.8 ideal), and vacuum. |
| Monthly | Shock the pool, clean filters, and inspect equipment. |
| Seasonal | Winterize pipes, cover the pool, and trim nearby trees. |

Conclusion
A well-executed pool installation elevates your home’s appeal and provides years of enjoyment. By partnering with a trusted contractor like Hi Poolss, you’ll navigate design, materials, and logistics with confidence. Ready to take the plunge? Contact Hi Poolss today for a consultation, and let’s turn your backyard dreams into reality!
Visit HiPoolss.com or call (678) 333-1792 to start your pool installation journey. Follow us on social media for more tips and inspiration!


The team at Hypools did a great job. Super friendly and knew what they were doing. Took a bit longer than I thought but totaly worth it. Pool looks amazing. Def recomend them!
Thank you so much! We’re glad you love the pool—thanks for your patience and kind words!